We’re an affiliate. We may earn a commission on qualifying purchases through the links on this page. Learn more by reading our disclaimer.
The Ultimate DIY 72 Hour Kit: What You Need To Know
If there was one thing you could do to prepare for the future, it would be to build a DIY 72-hour kit. A 72-hour kit is an emergency disaster preparedness supply pack that contains all the essentials needed to survive for three days following a natural disaster or another emergency event.
In this blog post, I will go through everything you need and how much of each item you should have in your own DIY 72-hour kit!
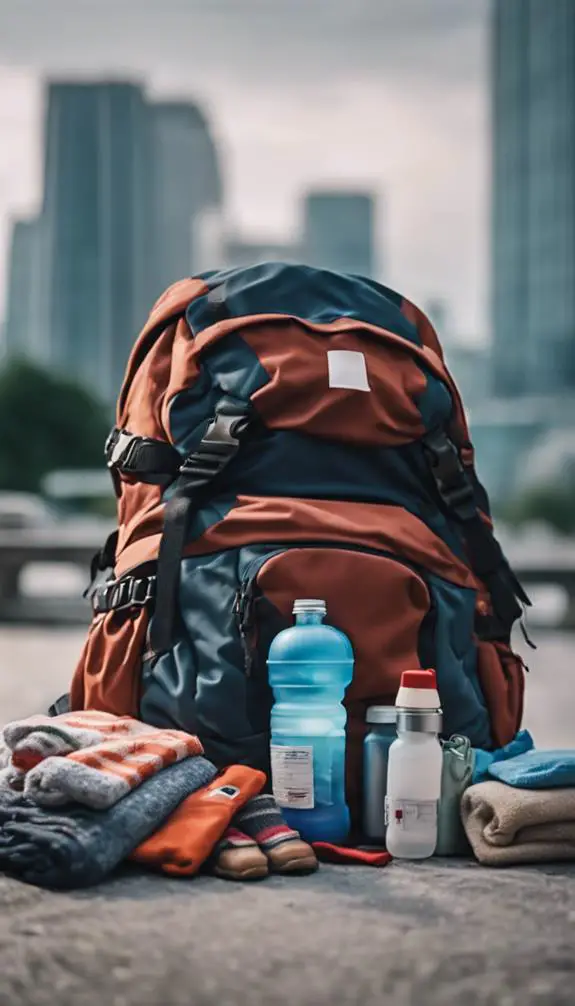
This is the ultimate DIY 72 hour kit, with everything you need to make sure that your family survives a natural disaster or another emergency. The list includes food, water, first-aid supplies, and tools to keep everyone safe. A few tips are included at the end of this blog post on how to put together a kit for yourself and your family.
What Is A 72 Hour Kit?
A 72-hour emergency kit is the most basic level of preparedness for disasters or emergencies, such as hurricanes, earthquakes, terrorist attacks, and evacuations. This type of kit should cover food, water, toiletries, any prescription medicine you are on, and clothing for at least three days in order to provide enough vitamins and minerals before your body starts to feel the effects of starvation.
What Is The Purpose Of A 72 Hour Kit?
The purpose of a 72-hour kit (also known as emergency kits) is to help one sustain oneself for seventy-two hours following major emergencies like earthquakes, industrial accidents requiring evacuation (e.g., chemical spill), tsunamis, flooding of sufficient magnitude, and many more situations. This kit will hold enough basic supplies to keep you going until help arrives or you can replenish your supplies.
When Would You Need A 72 Hour Kit?
There are many situations where you would need to have a 72-hour kit. These situations can be hurricanes, tornadoes, earthquakes, severe outbreaks of a serious illness, tsunamis, and other such events. In these situations, you would need to have at least a 72-hour kit ready to go so that you had the most basic supplies on hand.
What Should Be In A 72 Hour Kit?
Bottled water
Keep four liters of water on hand per day for each person. It is a good idea to use water like this CORE Hydration Nutrient Enhanced Water as it has electrolytes and it comes in a 30-ounce bottle which is just one 1 liter.
It’s good to rotate the water bottles in your 72-hour kit every time you change your clocks. If that’s not possible, you can use water from the toilet tank or hot water heater.
I know that if you are packing a kit for multiple people that this amount of water is a little unreasonable to be able to carry. In this case, we recommend getting a LifeStraw Personal Water Filter so that you can filter the water that you find.
Food
A minimum of three days’ worth of food that will not spoil and doesn’t require much preparation, such as canned or dried food, trail mix, and protein bars.
Keep an eye on food expiration dates when you change your clocks. If you store canned food in your kit, make sure to include a can opener so that you can open them if needed. Also, do not use a camping stove inside of the house, even with ventilation masks or other protective tools.
First Aid kit
First Aid kits should be easily accessible in your home and vehicle, generally containing the following items:
- gloves
- gauze pads
- a variety of bandages
- antiseptic
- scissors
- tweezers
- needle and thread
- instant ice packs
I use this 200 piece First Aid kit by Swiss Safe from Amazon for our survival kits.
Medication
Include all prescription medication that you or any other members of your family use.
Ideally, you should change the medication out regularly to keep the medicine in your kit fresh. If you cannot store extra medications in your kit, make sure you take them with you whenever fleeing home during an emergency evacuation. You may also want to include vitamins and medications to guard against catching a cold.
If you are receiving medical treatment from a clinic or hospital, ask what to do in an emergency.
Wind-up flashlight and radio
72-hour kits should contain a flashlight for dark spaces and a radio to receive weather reports. Wind-up models are available at many outdoor retailers, but those that use batteries (i.e. lights or radios) should always have extra on hand with a replacement schedule of once every 12 months.
Here is the wind-up flashlight and radio that we use in our emergency kits. It is Running Snail Emergency Crank Radio on Amazon. It also has a built-in battery pack to charge devices.
External battery pack or wind-up phone charger
We can all agree that it is a scary scenario to be without power or with limited access to communication for extended periods of time. With your mobile device, you’ll have reliable information and connectivity even if the cell phone networks get overwhelmed.
It is important to include a solar charging external battery bank or a wind-up charger so that you can keep your mobile device charged.
Dust masks and duct tape
What self-respecting 72-hour kit doesn’t have duct tape. I mean duct tape can be used for thousands of different things. One of the best applications for duct tape is to use it to hold things together.
In addition to the duct tape, it is also important to pack some sort of dust mask to wear in case of a dust storm or to keep you from inhaling unnecessary particles.
Whistle
A whistle is a great tool for your kit as you can use it to signal emergency personnel in case of rescue or to signal other survivors.
Personal sanitation items
You should consider including wet wipes, garbage bags, toilet paper, and hand sanitizer. These items are open forgotten items when people pack their emergency kits. If COVID taught us anything, I know I personally do not want to be stuck in another crisis without toilet paper.
Warm clothes and blankets or sleeping bags
You should include a warm blanket or even a compact sleeping bag so that you can get warm on a cold night as well as a change of clothes so that you can at least change during the ordeal.
We like to use a space blanket in our 72-hour kits as they take up less space than a traditional blanket even when rolled up. This is the space blanket that we like to use.
In addition to the space blankets, we also put a compact sleeping bag in our kits which gives us an added layer of protection and warmth.
Important documents
Keep emergency contact information and copies or digital files of important documents in your 72-hour kit. When adding new materials, review documents to ensure they are up-to-date. You should also make sure to grab your personal identification for each person when you evacuate.
Cash in small bills and coins
You should include a supply of cash that can cover any situation. You might also need coins such as those you could use for payphones or coin-operated laundry facilities.
Supplies for your baby
Stocking your backpack with the essentials for any situation is important. Make sure to include emergency supplies specific to the age or needs of each member of your family.
Supplies For Your Pets
Also, don’t forget your pets! Keep food and water on hand, as well as a leash and “emergency plan” info.
Entertainment
When crafting your ultimate DIY 72-hour kit, consider including entertainment. Entertainment can be helpful for both adults and children in easing worries of intense situations.
This can be small games, a deck of cards, or small items such as hacky sack. These items can be used to keep children entertained or to lighten the mood of a difficult situation.
Our Choices for Gear and Equipment
Backpack. One of the most common mistakes with 72-hour kits has to do with choosing a backpack. Choose one that will allow you to differentiate your survival gear into separate compartments so it is easier and quicker for you to access what is needed when disaster strikes.
Amazon offers many military-style backpacks, which can provide useful features like being able to attach water bottles securely on either side or having extra straps/folds over the lumbar region providing ample room for food storage as well as other equipment – making them perfect during an emergency situation where every item counts!
Our choice is this 50L Tactical Backpack.

Can opener. If you choose to pack canned foods of any kind then, you’ll need a way to get into the cans. This might be part of a Leatherman tool like this from Amazon or you could pack a separate can opener, it’s up to you.
Knife. Many people will pack a Leatherman tool and call it good, but we suggest having other cutting tools in case one is misplaced or doesn’t work for the job. Having a knife with a large fixed blade may come in handy if you find yourself needing to cut through larger items like plywood, drywall, or cardboard boxes. A high-quality knife is a must-have for any survival kit.
I am a blade enthusiast and like to carry two to three knives in my kits. Different knives have different purposes. I usually include a Mora knife in my kit for general cutting purposes, a larger fixed blade knife like the Mossy Oak Survival Knife for more rugged tasks such as cutting through brush as it also has a saw.
Flashlight. Make sure to pack a durable, lightweight flashlight. There are a bunch of options on Amazon for a flashlight that fits this but we like the M3 LED Tactical Flashlight, it comes in a two-pack and is also small so it won’t take a ton of room in your survival kit. In addition to the flashlight, I also highly recommend that you include a headlamp for each person in your family as it allows you to be hands-free but still have light. I recommend the GearLight LED Headlamp Flashlight S500 on Amazon.
Emergency two-way radio. If you’re looking for a way to stay informed and keep in touch during an emergency, there are many options available on Amazon. Our favorite model is this Midland GXT1050VP4 because it can cover a range of up to 36 miles and also functions as an NOAA weather radio which automatically scans for alerts from local authorities about any severe conditions or possible threats nearby. It’s not only affordable but very practical too!
BIC Lighter. We don’t recommend lighting fires in the aftermath of a disaster because you never know if a gas line has been damaged and may be leaking. However, every disaster situation is different and you may find yourself in need of a fire. Add a few BIC lighter’s to your pack, in case you need to build a fire.
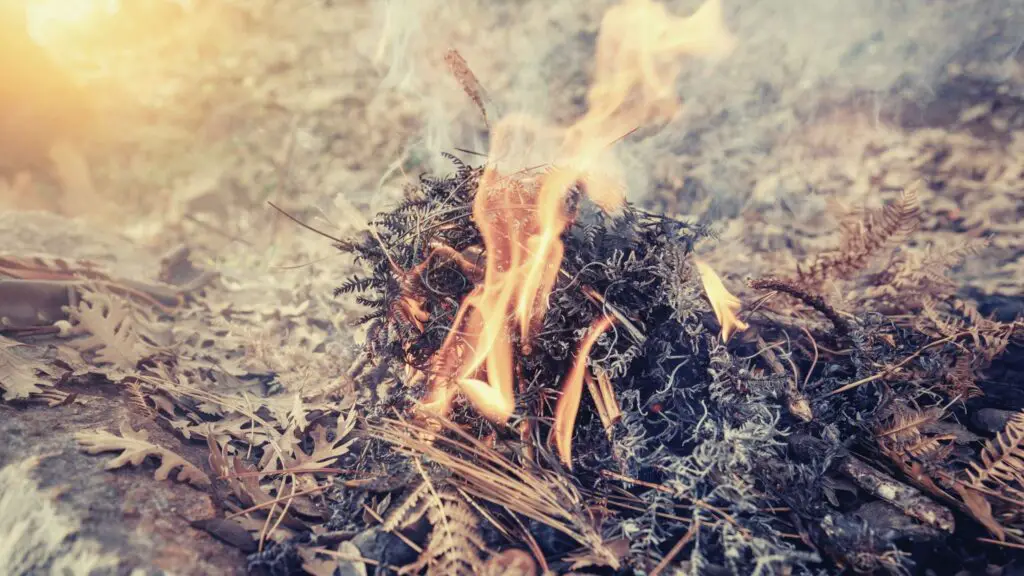
We recommend a BIC lighter over waterproof matches for a number of reasons, mostly because they can start thousands of fires, don’t add much weight to your pack, and can still be used to create a spark even after you run out of fuel.
Matches are virtually weightless, so you can still throw them in as a backup if you prefer. You can also add a flintstone to round out your fire starting needs. It is important to have a variety of tools for each task.
Extra batteries. All of your emergency electronics need power, and 72 hours is a long time to go between charges. Make sure to have plenty of backup batteries for all of your flashlights, radios, and any other items that need them. A solar charger from Amazon to use to charge your phone is also a great resource to have in emergency situations.
Gloves. You should consider including a pair of gloves in your emergency kit. If a situation arises where you would your kit as you might have to do most everything by hand in those situations. Gloves are a good way to prevent blisters and other damage to your hands. Gloves can also be used to sheathe a pair of scissors or other sharp utensils you may have in your pack. I have a pair of these basic Ironclad gloves that I keep in my kit as well as my truck to protect my hands.
Tent. There are many factors to consider when choosing a family tent. A two-man tent probably won’t fit two people and their packs, especially if you want to be comfortable. Have enough space for everyone in the family by going with a 6–8 person size of your choice so there is room for all members including gear inside the tent at all times! You don’t want bugs or other animals getting into any of it – store everything away safely out of reach from little adventurers who may wander off while exploring outside!
Poncho. Ponchos are a great addition to your survival kit, and they can be used for more than just keeping dry. They also provide protection from the sun if you’re ever stuck out in an open field during midday hours. If it’s really cold outside, ponchos may even keep us warm enough so that we don’t need extra layers on top of our other clothes!
Additional Items to Add in your 72-hour kit
Different survival kits require different things to survive, but there are some basics that everyone needs. However, depending on your pack and the type of situation you’re in, these items may or may not be necessary for 72 hours.
Dishes/utensils. Having a set of utensils is necessary for eating. We have to make sure we pack something like this mess kit that includes everything from forks and spoons, knives, and cups!
Rope. For the person that likes to be prepared and needs a rope with them everywhere they go, this is an excellent choice. The polypropylene 1-inch cam strap has more than enough load capacity for any situation you might find yourself in while still being able to fit into your pocket or backpack easily!
Hatchet. The hatchet is the ultimate multi-tool for your 72-hour kit. You can chop wood, or use it as a hammer to create shelter from any material you have with you – even if that’s just some rocks on the ground!
Sleeping bag. Sleeping bags are not typically the most exciting of purchases. They always present an interesting size and weight problem, which is why they landed on our “probably want” list. You can make do without a sleeping bag by wrapping yourself in several thermal blankets or you have an option to buy one that weighs less than 4 ounces! It’s more uncomfortable than a big fluffy sleeping bag but it will keep you warm at night for those cold nights outdoors with no shelter nearby
Sheets. Cloth and plastic sheets are versatile so they can be used in a lot of situations, such as ground cloths, table cloths, bandages, or even food covers.
Shovel. A military folding shovel is an ultimate multitasker for any situation. The blade can cut through many materials, pry open doors and windows, hammer nails into wood or metal surfaces with ease; all without having to lug around a heavy toolbox in your backpack.
Bug repellant. Bug spray will protect you from bugs in the aftermath of a disaster. It is important to pack bug repellant because it can help keep irritating bites and painful stings away while also preventing diseases that are spread by insects such as Zika, West Nile Virus, or Lyme Disease.
Disposable camera. If you want to document the damage done to your home after a natural disaster, make sure not only to take pictures with an old-school camera but also use one that is disposable. This way if anything happens during or afterward, it will be easy for you and others who helped clean up any messes in your house because of the storm without having to worry about using their cell phone cameras.
Gum. Chewing sugarless gum can help prevent tooth decay that would be caused by sugary foods. Watch out for mint-flavored gum! The flavoring in the peppermint could get into other items you have, like your granola bars, and give them a yucky taste.
Pen and paper. When you’re faced with an emergency, there are a number of things to keep in mind. Whether it be more specific information like the milepost or contact numbers for family friends, make sure that all this is stored somewhere safe and organized. It might not seem important at first but when something goes wrong you won’t regret being prepared!
Powdered Gatorade. Adding powdered Gatorade to your water is a great way to rehydrate and add some flavor to your drinking water.
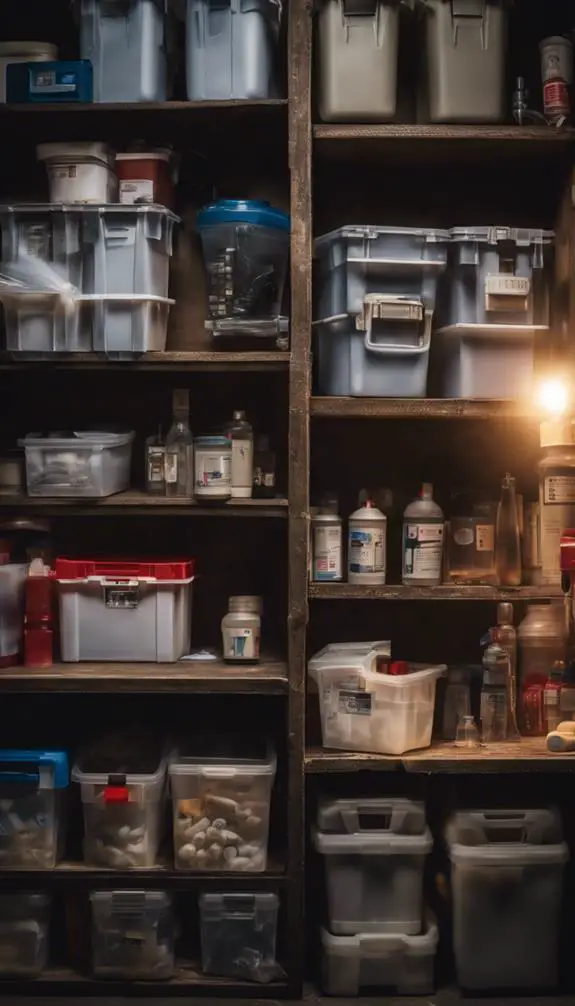
How do I store my supplies?
- Ideally, supplies should be stored in a portable waterproof wheeled suitcase or container. Your kit must be portable with both your luggage and emergency kits that are stored away from home in case you’re forced to evacuate for any reason.
- If needed, store bags of necessary supplies in your luggage when not travelling so they are easily accessible – otherwise remove the bags
- Store essential items like medications and wallets in an external pouch for easy access. Your First Aid kit and water supply should also be close by so you can find them easily.
- Check your kit every time the clocks change so you can spot any items that need to be added or replaced.
Tips for making a 72-hour kit on a budget
- It may be wise to store certain items before a disaster strikes. Don’t go out and buy everything without putting some thought into it.
- Spend 5% extra on groceries each month in order to build up the supplies you need for your 72-hour kit. If you can afford it, you can also buy an extra non-food item such as batteries, duct tape or other miscellaneous supplies when you go shopping.
- Certain books and online resources teach you how to pickle, can, and preserve food. This is a good option for those with allergies or dietary restrictions.
- Although it is safest to buy bottled water, you can store water in safe vessels at home. Plastic containers work better than glass because they are lighter and safer if dropped. Make sure the bottles have a good seal by covering them tightly when not using your tap water.
How Much Water Should Be In A 72 Hour Kit?
You should include at least four liters of water per day per person. This would be a total of 12 liters per person that the 72-hour kit is for. If you are building out the kit for a family of four – then you would need a total of 48 liters.
What Food Should Be In An Emergency Kit?
You should include food that is high enough in calories to sustain you for three days. The average adult woman eats between 1,600-2,200 calories a day whereas the average adult male eats between 2,000-3,200 calories a day. Things like high-calorie protein bars, MREs, and other non-perishable food items are your best bet.
Where Should I Keep My 72 Hour Kit?
The 72-hour kit should be stored in a shady, cool area as high and dry as possible. Your 72-hour kit should be accessible without too much difficulty if you are forced to leave your home quickly. You want the 72-hour kit to be out of harm’s way from flooding or water damage such as rain runoff or moisture seeping up from the floor level.
In Conclusion
In the end, you want your 72-hour kit to be one that is as specific and personalized to you or your family’s needs. You may find yourself in a situation where it would have been helpful if only this particular item was included; take time now to think about what will make your bag more effective for you!
So, there you have it. The ultimate DIY 72 hour kit should be assembled with items like these and the knowledge that they can carry you through a variety of situations to make sure your family is safe.
You may not need all 3 days’ worth of food or water if an emergency only lasts 2 hours but being prepared for any potential disaster could save lives in the long run.
Now go get started on assembling your own! We’ve done our best to give some ideas about what each item means for emergencies so hopefully, this will help narrow down where exactly things are going wrong in your plan while also giving you more confidence in knowing how much stuff you actually need when putting together a survival kit like this one.
If you like this post, please consider sharing it on social media and with friends. Also, check out some of our other posts for more information on survival.