As you stand in front of your prepper pantry, you can't help but feel overwhelmed by the sheer amount of supplies and clutter. You know you've got everything you need to weather an emergency, but finding what you need in a timely manner is a different story. It's time to get organized. By implementing a few strategic systems and habits, you can transform your pantry into a well-oiled machine, ready to support you in any situation. But where do you even start?
Summary
- Assess pantry dimensions to determine maximum storage capacity and identify areas for improvement in shelving and storage units.
- Purge and declutter expired, spoiled, or unnecessary items to create a more efficient and peaceful pantry space.
- Categorize supplies into logical groups, such as food, water, first aid, and shelter, to quickly identify what is needed and what needs to be restocked.
- Maximize vertical space with sturdy shelves, adjustable racks, and labeled bins to optimize storage capacity and keep pantry organized.
- Implement a stock tracking system to prevent waste and reduce the risk of expired food, and establish routines for maintaining the organized pantry.
Assessing Your Pantry Space

How efficiently can you navigate your pantry space?
Take stock of your pantry dimensions and layout to identify areas for improvement. Measure the length, width, and height of your pantry to determine the maximum storage capacity.
Consider the shelving and storage units you have, and think about how you can optimize their use. Are there any obstacles or bottlenecks that hinder your ability to access the items you need? Make a mental note of these challenges and start brainstorming solutions.
A well-designed pantry layout can help you save time, reduce stress, and increase your sense of freedom. By understanding your pantry's limitations and potential, you'll be better equipped to create a space that serves your needs and supports your prepping goals.
Purging and Decluttering Essentials

Now that you've assessed your pantry space, it's time to tackle the often-daunting task of purging and decluttering essentials.
This step is vital in achieving your pantry goals, as it sets the stage for an organized and functional space. Adopt a decluttering mindset: be ruthless and honest with yourself about what you truly need and use.
Remove expired or spoiled food, broken items, and anything that no longer serves a purpose. Consider the 80/20 rule – 80% of the time, you likely use 20% of your pantry items.
Focus on keeping only the essentials that align with your prepping goals and priorities. By purging and decluttering, you'll create a more efficient and peaceful pantry space that empowers you to take control of your food storage and preparation.
Categorizing Your Prepper Supplies

Your prepper supplies are categorized into groups that make sense for your pantry's specific needs and goals.
This supply categorization allows you to quickly identify what you have, where it's stored, and what you need to restock. A well-organized category system guarantees you're not duplicating efforts or wasting resources.
You can categorize supplies by type, such as food, water, first aid, and shelter. Alternatively, you can organize by scenario, like natural disasters or power outages.
Consider the frequency of use, expiration dates, and storage requirements when determining your categories. With a clear and logical system, you'll be better prepared to respond to emergencies and maintain your independence.
Shelf Organization Strategies

You'll get the most out of your prepper pantry by implementing strategic shelf organization.
To do this, you'll want to maximize vertical space by installing shelves or stackable containers, allowing you to store more supplies in a smaller footprint.
Maximize Vertical Space
Sturdy shelves are the backbone of a well-organized prepper pantry, providing ample opportunities to maximize vertical space.
You can optimize your storage capacity by installing vertical shelves that go all the way up to the ceiling. This will allow you to store more items without taking up valuable floor space.
Consider using adjustable racks to customize the shelf height according to the size of your containers. This flexibility certifies that you can accommodate various sizes of storage bins, baskets, or cans.
Label and Categorize
With your shelves in place, it's time to tackle the next step in prepper pantry organization: labeling and categorizing your storage space.
This vital step guarantees you can quickly find what you need in an emergency.
Using a label maker, identify each shelf or section with its contents, such as "Canned Goods" or "Baking Supplies."
Categorize similar items together, like all your grains or protein sources.
This pantry system allows you to see at a glance what you have and what you need to restock.
Bin and Container Systems

You'll want to choose bins that meet your specific needs, considering factors like size, material, and ease of cleaning.
Effective labeling and signage will guarantee you can quickly identify what's inside each container, even when they're stacked. By implementing a thoughtful container stacking system, you'll maximize your storage space and keep your prepper pantry organized and efficient.
Bin Selection Criteria
Selecting the right bins and containers is crucial to an efficient prepper pantry organization system.
When choosing bins, ponder the materials they're made of. You'll want durable, easy-to-clean options like plastic or metal. Avoid flimsy or brittle materials that can break easily.
You should also think about storage capacity. Calculate the volume of the items you need to store and select bins that can hold them comfortably. Don't forget to ponder the shape and size of the items, too. You'll want bins that can fit snugly on shelves or in corners, maximizing your storage space.
Labeling and Signage
By the time you've chosen your bins and containers, you're likely enthusiastic to start filling them up with your prepper pantry essentials.
However, before you do, take a step back and think about labeling and signage. This vital step guarantees you can easily identify what's inside each bin without having to dig through them.
Invest in a label maker and use clear, concise labels that indicate the contents and expiration dates. Place labels on the front and top of each bin for easy visibility.
Strategically position signage above each shelf or section to categorize your supplies, such as "Food Storage" or "Medical Supplies." This will save you time and reduce stress when you need to access your supplies quickly.
Container Stacking Systems
A well-organized prepper pantry relies on a thoughtful container stacking system, which maximizes storage space while maintaining easy access to essential items.
You'll want to choose a system that's adaptable to your unique needs and space constraints. Consider investing in stackable drawers or modular shelves that can be easily rearranged as your stockpile evolves.
These systems allow you to categorize and store similar items together, making it simple to find what you need in a crisis. Label each container or shelf to certify you can quickly identify contents, and keep frequently used items in easy-to-reach locations.
Labeling and Signage Tips

Since you've invested time and effort into stocking your prepper pantry, it's vitally necessary to maintain organization and visibility through effective labeling and signage.
You'll want to explore various label maker options, such as handheld devices or computer-connected models, to find the one that suits your needs. Consider the type of labels you'll need, including adhesive, waterproof, or reflective options.
For signage placement strategies, think about high-visibility areas like shelving units, bins, and containers. Clearly label each category, such as "Grains" or "Canned Goods," and consider adding sub-labels for specific items within those categories.
Food Storage Best Practices

Every prepper knows that storing food efficiently is crucial to maintaining a well-stocked pantry.
You want to guarantee that your food storage area is cool, dry, and dark to preserve the shelf life of your supplies.
Store food in airtight containers to protect against moisture, pests, and spoilage.
Implement a First-In-First-Out (FIFO) system to maintain food rotation, which helps prevent stock expiration.
Label containers with the date of storage and contents to keep track of your inventory.
Store heavy items at the bottom and lighter items on top to prevent damage.
Rotating Stock and Inventory

By the time you've stocked your pantry with a year's worth of food, you'll want to guarantee that your oldest items are consumed before they expire.
Implementing a stock tracking system will help you keep tabs on what you have and when it was stored. This confirms that older items are used before newer ones, preventing waste and reducing the risk of expired food.
Effective expiration management is vital to maintaining a well-stocked pantry. Label each item with the date it was stored, and organize your shelves by expiration date. This way, you can quickly identify what needs to be used first.
Regularly review your stock to identify items nearing expiration and plan meals around them.
Maximizing Vertical Space

As you've carefully curated your pantry's inventory, now it's time to optimize its physical space.
You want to make the most of every inch to guarantee you can stockpile enough supplies for the long haul. To maximize vertical space, consider installing vertical shelves that go all the way up to the ceiling.
This will allow you to store less frequently used items, like specialty foods or bulk items, out of the way but still within reach. Adjustable racks are also a great option, as they can be customized to fit your specific storage needs.
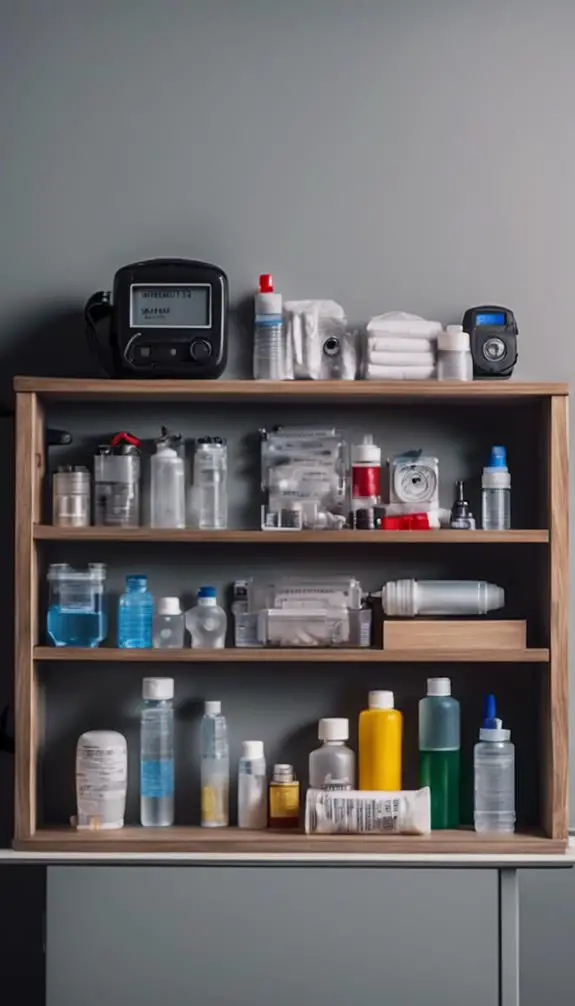
Creating a First-Aid Station

You'll want to stock your first-aid station with essential items, including bandages, antiseptic wipes, and pain relievers, to guarantee you're prepared for minor injuries.
Next, consider the basics of wound care, such as cleaning and dressing wounds, to prevent infection and promote healing.
Essential Items Checklist
Creating a well-stocked first-aid station is crucial to addressing medical emergencies in a survival situation.
You'll want to guarantee your pantry goals include a thorough first-aid kit that meets your stock levels. Start by checking your current supplies and identify what's missing.
Essential items should include bandages, antiseptic wipes, pain relievers, antibiotic ointments, and any personal medications. Don't forget to stock up on medical gloves, tweezers, and scissors.
Consider adding a first-aid manual or guide to help you navigate medical emergencies. Finally, make sure your first-aid station is easily accessible and visible, so you can respond quickly in case of an emergency.
Basic Wound Care
Proper wound care is critical in a survival situation, and your first-aid station should be equipped to handle basic wound management.
You'll need supplies for wound cleaning, including antibiotic ointments, sterile water, and gauze pads. Don't forget tweezers and scissors for removing debris.
For wound dressing, stock up on bandages, band-aids, and medical tape. Consider adding a wound cleanser, like hydrogen peroxide or saline solution, to your kit.
It's also essential to have a guide on wound care, such as a first-aid manual, to walk you through the process. By having these basics on hand, you'll be better prepared to treat wounds and prevent infection in a crisis situation.
Medicine Storage Tips
As you assemble your emergency preparedness supplies, a well-organized medicine storage system is essential for quick access to imperative medications and medical equipment.
Create a dedicated first-aid station in your prepper pantry, using airtight containers or bins labeled by category (e.g., pain relievers, antibiotics, ointments).
Implement a medicine rotation system, ensuring expired items are removed and replaced regularly.
Set a schedule for expired disposal, so you don't end up with ineffective or harmful medications.
Store medications in their original packaging, and keep instructions and dosage information easily accessible.
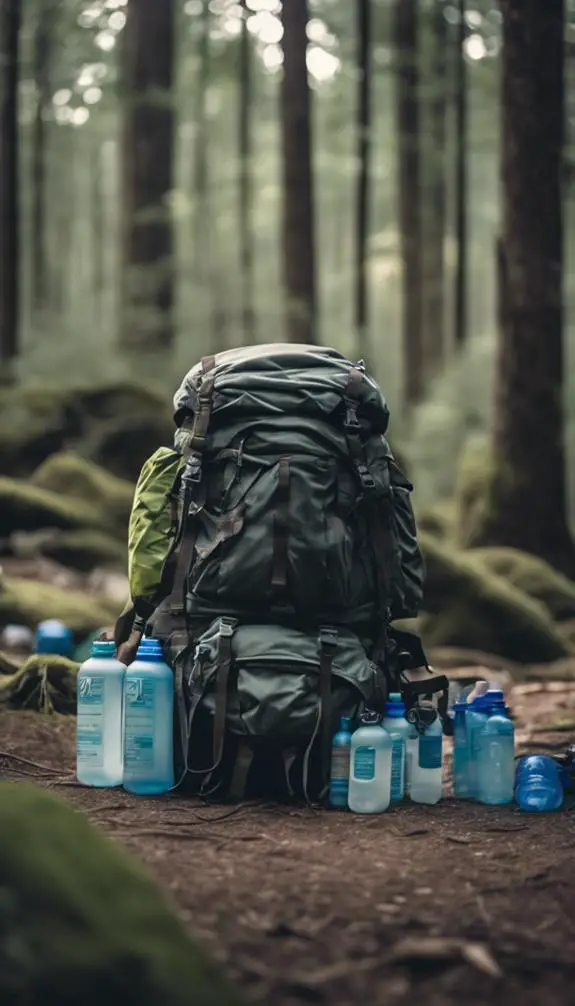
Designating a Bug-Out Zone

Your bug-out zone is a critical component of your prepper pantry organization, serving as a centralized hub for your emergency supplies.
When designating this zone, consider a location that's easily accessible, yet out of sight from potential intruders.
This area should be stocked with your bug-out kit, containing essential items like food, water, first aid supplies, and communication devices.
Emergency staging is key, so verify everything is neatly organized and ready to grab at a moment's notice.
Assign a specific spot for each item, making it easy to find what you need in a high-stress situation.
Utilizing Hidden Storage Areas

How do you maximize the storage capacity of your prepper pantry while keeping valuable supplies out of sight from prying eyes?
You create hidden storage areas, of course! One way to do this is by installing hidden shelves or secret compartments behind false walls, inside cabinets, or beneath floors.
These concealed spaces can store sensitive items like firearms, important documents, or precious metals. Consider using sliding panels, hidden drawers, or fake electrical outlets to conceal your stash.
You can also repurpose everyday items like hollowed-out books, fake food containers, or secret compartments in furniture to stash small items.
Maintaining Your Organized Pantry

With your prepper pantry organized and hidden storage areas in place, it's vitally necessary to establish routines for maintaining this setup.
You've worked hard to achieve your pantry goals, and now it's time to guarantee they remain a reality. Create a maintenance schedule to stay on track.
Set aside time each week to tidy up, check expiration dates, and restock as needed. This will prevent clutter from building up and keep your supplies fresh and usable.
Review your inventory regularly to identify areas for improvement and make adjustments to your storage systems as needed.
FAQs
Can I Use Old Furniture to Create a Prepper Pantry?
You can breathe new life into old furniture by repurposing it for custom shelving, creating a unique and functional space that's perfect for storing your emergency supplies, and you'll reduce waste while saving money in the process.
How Do I Keep Pests Out of My Food Storage Containers?
You'll keep pests out of your food storage containers by using effective pest control methods, such as bay leaves and diatomaceous earth, alongside airtight containers that seal tightly, ensuring your supplies remain safe and protected.
Are There Any Prepper Pantry Organization Apps Available?
You're looking for apps to organize your pantry, right? Check out Pantry Mapper and Inventory Tracker, two top-rated apps that help you categorize, track, and manage your stockpile, ensuring you're always prepared and in control of your supplies.
Can I Store Flammable Items in My Prepper Pantry?
You shouldn't store flammable items in your pantry, as they pose significant fire risks. Instead, designate a well-ventilated area outside, like a shed or detached garage, for flammable storage to minimize the danger of a devastating blaze.
How Often Should I Inspect My Prepper Pantry for Expired Items?
You should regularly inspect your stockpile for expired items, ensuring food freshness and peak shelf life, as stale or spoiled goods can be hazardous to your health and undermine your self-sufficiency goals.
Conclusion
You've optimized your pantry space, purged unnecessary items, and categorized your prepper supplies. You've implemented shelf organization strategies, bin and container systems, and designated areas for first aid and bug-out kits. Now, maintaining your organized pantry is key. Regularly check expiration dates, restock essentials, and update your inventory. By doing so, you'll guarantee your prepper pantry remains a valuable resource, ready to support you in any emergency situation.